- Aromatherapy (36)
- Benefits of Yoga (282)
- Home Remedies (1087)
- massage therapy (9)
- Preventive Therapy (135)
- Running (41)
- Skin Care (15)
- Stress Relief (25)
- Stretching (5)
- walking (33)
- Womens Health (14)
- Yoga Benefits for Pregnant Women (16)
- Yoga Benefits for Students (3)
- Yoga for Children (11)
- Yoga for Holistic Living (37)
- Yoga for Midlife Crisis (3)
- Yoga for Senior Citizens (2)
- Yoga for the Workplace (1)
- Yoga Health Tips (185)
- Yoga Practice during Menstruation (5)
Instructions for Pigeon Pose And Squat Yoga
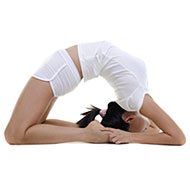
I. Pigeon Pose ( Kapotasana ) Postures
Pigeon Pose is called Kapotasana in Sanskrit. It facilitates deeper breathing, and is excellent for opening up the chest and hips.
Instructions
- To start, go down on all fours, in what is called the table top position. Now, slide your left knee forward between your hands. Lower your hips to the floor, slide your right leg back and your left foot to your right.
- Press your fingertips or palms down into the mat and, with an inhalation stretch your spine and look up.
- Now, with an exhalation, sink your hips lower down into the mat. Lean forward and press through your chest, then roll your shoulders down and back.
- Hold the pose for 4 – 5 breaths, breathing normally.
- Move deeper into the pose, as far as you can go, still breathing deeply.
- Hold here for another 4 – 5 breaths.
- To exit the pose, support your body weight on your hands and slide your left knee back into the table top position.
- Repeat the pose on other side for the same length of time.
II. Squat Or Garland Pose ( Malasana ) Postures
Malasana (Garland or Squat Pose) is an excellent Yoga pose, particularly recommended for relief from back aches. It also aids digestion and has a great impact on the groin. This Pose makes the ankles more flexible and gives your neck, back and lower legs a thorough massage.
Instructions
- To start, stand on the mat, legs about one and a half feet apart, parallel to each other.
- Now, bend your knees and go into a squat.
- Next, bend your elbows and push them against the inside of your knees.
- Join your palms together in anjali mudra (prayer position).
- Try to raise your hands up to your heart keeping your forearms parallel to the floor. Keep pushing your knees away as much as you can.
- Your shoulders should, at all times, be relaxed, spine erect.
- Hold the pose for 5 – 6 breaths
- To exit the pose, release your hands and straighten your legs, then come up to an upright, standing position.
If you feel your heels rising up as you squat, feel free to place a folded blanket beneath your heels, for support, rather than try to balance on the balls of your feet. Once your feet are parallel, gently try walking them closer toward each other. While the stretch focuses mainly on the front of your body, try not to lose the supportive power and dynamism of your lower back. Your upper back and chest will sink down, if you let your lower back lose its supportive function and you will also lose the sensation of relaxation.
« Previous blog Yoga Warm Up Poses & Exercises
Next blog » Windmill Pose And Little Boat Twist – Step By Step Instructions
ADVERTISEMENT
Related Questions
- RSS Feeds -
- All posts
- All comments
Related Articles
- You Can Thank Yoga for Better Sex Yoga can not only help you relax and De-stress, it can also help boost your s...
- Quad Strengthening Exercises Quad Strengthening Exercises For Thigh MusclesQuad ex...
- How Yoga Can Help Your Kid The ancient Indian science of yoga is believed to have a positive impact on the ...
- Exercises for hyperextended knee Whenever the knee flexes in the opposite direction and extends beyond the straig...
Related Topics
Categories