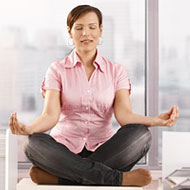
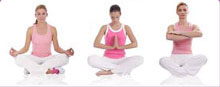
How To Improve Upper Back Posture
We are habituated to looking in the front direction always. When we pick things up or try to get things off shelves, our movements are always in forward direction. There are hardly any backward movements to compensate with this.
Gradually we slump because we are not making any movement to move back our shoulders into correct position. The muscles that provide support to them and give shape to the upper back lack exercise.

As a result our upper back gets a rounded appearance, shoulders droop forward and chest collapses, leading to poor posture, breathing. Usually at this point we seem irritated and depressed, as there is pain in the shoulder blades and due to tiredness and tension.
The chest expansion
- Take your fingers behind your back and lock them. Move your hands, in a breaststroke manner, outwards. This will enable you to breathe deeply and freely because this exercise cause the rib cage to extend and will open the chest at the same time.
- Your elbows should be held straight; your hands should be clasped and drawn towards your buttocks. Then your shoulders should be pulled back gently.
- Keep your hands straight and them away from your buttocks. Inhale as you do this. Next, squeeze your shoulder blades together and lift your hands as far as you can. The squeeze should be a nice strong one.
- Allow your elbows to bend as you lower your arms and exhale.
- Work rhythmically with your breath and repeat this as few more times. Towards the end of this exercise breathe naturally and hold yourself in the upper position for a few moments. Then with an out breath slowly lower your arms and release your hands.
Four Upper back tension relievers
It consists of, four exercises in a sequence and is very good to ease tension created between the shoulder blades and the upper back. It works on the joints of the finger, hands and wrists and gives stretch to the entire torso and the arms.
These exercises should be performed in the correct order because the exercises increase in strength. Give occasional rest to your arms if you are doing all the exercises. Choose the first one or second one if you are doing only one or two exercises.
Exercise 1
- Sit in the basic, correct manner. Lock your fingers in front so that your knees face your palms, straighten your elbows as you exhale.
- Push your palms away from you and exhale. Raise your straight hands above your head and let your palms face the ceiling. Pull yourself to have a good stretch upwards.
- Continue to stretch and push your palms away from you. Lower your arms to the front and exhale.
- Repeat this two more times before resting your hands in your lap.
Exercise 2
- Lock your fingers in the front, straighten your elbows and turn your palms to face your knees as you exhale.
- Now, when you raise your straight hands above your head, let your palms face the ceiling and you inhale.
- Clasp your hands together and lower them behind your head. Let your palms face the back of the head and avoid touching it. Squeeze at the top of your shoulder blades by directing your shoulders and elbows back.
- Straighten your arms. Keep your elbows and shoulders back and stretch your palms towards the ceiling as you inhale.
- Lower your arms in front. Stretch your palms away and exhale.
- You can repeat this twice. Meanwhile your hands can be rested in your lap.
Exercise 3
- Lock your fingers. Straighten your elbows and turn your palms to face your knees as you exhale.
- Raise your straight arms above your head with your palms facing the ceiling and you inhale.
- As mentioned in exercise two, lower your clasped hand behind your head as you exhale. This time provide rest to your cupped palms against the back of your head.
- Turn your head slowly to the right and then to the left by keeping your elbows and shoulders back.
- Breathing freely, repeat this exercise three to four times on each side.
- Stretch your arms up with your palm facing the ceiling and inhale.
- Lower your arms in the front and stretch your palms away as you exhale. Now your hands can be rested in your lap.
Exercise 4
- Lock your fingers in the front. Let your palms face your knees and straighten your elbows as you exhale.
- Raise your straight arms above your head with your palms facing the ceiling and inhale.
- Lower your clasped hands behind your head. Keep your shoulders and elbows back. Let your hands be a little away from your head and exhale.
- Now breathe freely and move your arms in a large oval manner, moving your elbows as far out as possible on each side. Keep your arms low and as far back as possible. Repeat this three to four times. Then reverse the direction of the exercise.
- Stretch your palms towards the ceiling as you inhale.
- Lower your arms in front, stretching and pushing your palms away while breathing out. Your hands can be rested in your lap.
- Circle your shoulders gently forwards and backwards a few times and finish the sequence.
The Shoulder blade shove
This exercise will make you aware of the existence of this particular area of the body usually referred as “ dead area” by many people, as one doesn’t use that area often and cannot touch it easily either. This exercise, works wonders in toning, strengthening and increasing circulation in the muscles of the upper back. You may not feel the movement instantly because you don’t use these muscles often. But if you continue with it, your posture will improve.
- Let your arms hang loosely by your sides and sit, in the basic sitting position.
- Now, lifting your shoulders up, draw them back and gracefully pull them away from your ears. Now, you will start feeling faintly that your chest space has increased and upper back is flat and wide.
- Empty your lungs by breathing out.
- Raise your arms to shoulder level, sideward and inhale.
- Form loose fists of your hands with your thumbs curled outside and breathe out.
- Slowly move your arms and shoulder blades away from the midline of the body and inhale. Start feeling that space has been created between the shoulder blades. Think that your arm and shoulder blade are forming a single unit.
- Draw your shoulder blades together as you exhale. Don’t pull your shoulders back or lift them to dot this: the work is all in the upper back.
- Stretch your fingers out, bending your hands up at the wrists, so that the tips of your finger are pointed towards the ceiling, while you inhale. When you do this remember to squeeze your shoulder blades together firmly.
- Slowly lower your arms. Squeeze your shoulder blades together firmly and exhale. Your arms should be alongside your body. Through out this exercise, note that your arms should be straight.
- The squeeze should then be released.
- To finish with this, gently circle your shoulders backwards. Repeat this twice or thrice.
This particular “ shoulder blade “ exercise in the long term will strengthen your spine and make it more flexible and will help you to avoid or correct round shoulders. That is why it is considered the ultimate exercise because it is capable of exercising those parts of the body, which other exercises cannot reach.
Tension relieving massage
Let me suggest you a little massage meant to release you from the tension created in the neck, shoulders and upper back before ending this chapter.
Place the palm of your right hand on the left side of upper portion of your back in between the tip of your shoulder and your neck. With your hand gather a handful of muscle and skin and knead it gently, using all your fingers and heel of your hand as if you are kneading to make bread. You may feel a little uncomfortable or may experience some pain. There will be much discomfort if you are tense because your muscles would be tight. Pay heed, don’t try to force things but carry on careful and gentle massage of kneading.
After sometime continue to hold handful of skin and muscle. But stop kneading. Shrug your shoulder gently up and down a few times. Then circle it backwards a few times slowly and gently.
Slowly look over your left shoulder and then over your right. Then start with the massage on the right side. Keep a not e on how far you can see on each side and whether you feel any difference.