Headstand - Sirshasana
The Headstand is one of the many inverted poses in yoga. Yoga developed as a discipline or way of life in ancient India, but has over the years become a popular exercise alternative.
The most commonly practiced kind of yoga is the Hatha Yoga.
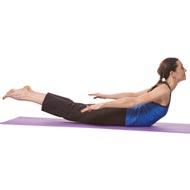

Sirshasana or supported yoga Headstand is an advanced inverted yoga pose. It is often considered to be an inverted Tadasana (Mountain Pose) since the pose actually progresses in the same manner. Of course, since this pose is performed upside down, you may feel differently when performing it. This is an advanced level pose which should only be performed by advanced practitioners in the presence of a trained yoga teacher or expert. When you begin performing it, you may only be able to hold it for a few minutes, but as you gain more practice, you will be able to perform this pose for 30 to 40 minutes at a stretch. This pose reverses the flow and sends blood to the brain.
Steps
Here are the Headstand pose steps.
- Step 1: Fold a blanket or a sticky mat and place it on a flat surface. Kneel in front of the blanket, setting your forearms on the floor and lacing your fingers together. Keep your elbows shoulder width apart. Slightly roll your upper arms forward, pressing the inner wrists into the floor. Now bring the crown of your head towards the floor. To give yourself a boost, press the bases of both your palms together and move the back of your head to rest into your open palms, on top of your interlaced fingers.
- Step 2: Take in a huge lungful of air and elevate your knees so that they are off the floor. Bring your feet close to your elbows, while keeping your heels elevated. Try and form an inverted V-shape by lifting the top of your thighs. Lift your shoulder blades towards the tailbone, keeping the front torso as long as possible.
- Step 3: Exhale and bring your feet away from the floor, lifting them up in the process. Try to kick up both your feet into the air at the same time. You may need to bend your knees to pull it off, but keep your tailbone firm or you may collapse under your own weight. Turn your thighs slightly inwards and press your heels upwards. If you had bent your knees to kick your legs into the air, you can now straighten them. Keep the arches of your feet aligned over the center point of your pelvic area. The crown of your head should also be in line with the pelvis and the arches of your feet.
- Step 4: Bringing your outer arms inwards, press your shoulder blades to the back and widen them gently. Draw your shoulder blades towards the tailbone while keeping your weight balanced evenly on your forearms. Lengthen the back of your legs completely and press the balls of your big toes upwards so that you are completely in balance.
- Step 5: Hold the position for at least 10 seconds at first.
If you can, keep adding 5 to 10 seconds to the position till you are able to hold the position for at least a few minutes. Do not force yourself to hold the position for longer than you feel comfortable with. Exhale as you come down, but keep your shoulder blades firm as you do that so that you do not fall or injure yourself.
Precautions
There are some precautions that you should keep in mind when attempting to perform the headstand pose. If you have headaches or neck injuries, avoid performing the pose completely. Those suffering with back injuries and heart conditions should also avoid performing this pose. It is best to avoid performing this yoga pose if you have a circulatory problem. The pose is also not recommended for women who are pregnant or are menstruating.
Beginner’s Tip
This is a pose in which the neck and the head tend to take a lot of weight. Beginners should never attempt this pose except under a watchful eye of a trained professional. This can be harmful for delicate neck and back joints. The best beginner’s tip for the Headstand pose is to perform it against a wall. You can set your arms in place first and work to slightly lift your head off the floor. Make sure that most of your weight is supported by your shoulders and forearms and not your neck or the head. Be cautious even when exiting this pose. Try to lift your head off first and only then bring your feet down or you may end up putting all your weight on your head and neck.
Benefit to Body Part
The best benefit of this pose is to your head, shoulders and forearms. By sending more blood to your brain, it can calm the brain and relieve both stress as well as mild depression.
- It can also strengthen your arms, legs and your spine.
- Works on improving core strength, while toning the abdominal organs.
Therapeutic Applications
The pose is excellent for those suffering from asthma and insomnia. Other therapeutic applications include:
- Helpful for dealing with infertility
- Can combat sinusitis
- Stimulates the pituitary and pineal glands, improving the secretion of growth hormones
- Therapeutic for women going through menopause
- Increases lung capacity and strengthens the lungs
- Helps improve indigestion
Variations
There are not many variations for the Headstand pose, but the simplest of them is known as the Eka Pada Sirshasana. In this pose, you have to lower your right leg so that it is parallel to the floor. This will often cause your right hip to slightly sink lower, but turning the leg slightly outwards can help you correct this problem. Hold the pose for a few seconds and then reverse the legs and repeat.
Preparatory Poses
The preparatory poses for the Headstand pose include:
- Adho Mukha Svanasana (Downward Facing Dog)
- Salamba Sarvangasana (Supported Shoulderstand)
- Uttanasana (Standing Forward Bend)
- Virasana (Hero Pose)
All of these poses help you improve your balance so that you can easily perform the headstand.
Follow Up Poses
The follow up poses to the Headstand include:
- Adho Mukha Svanasana (Downward Facing Dog)
- Balasana (Child Pose)
 Find Pose